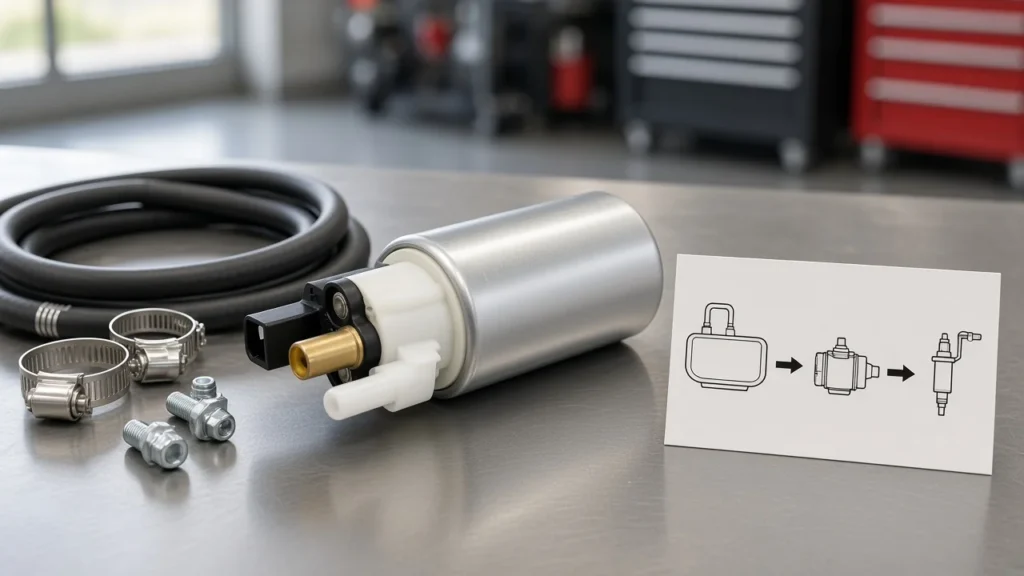
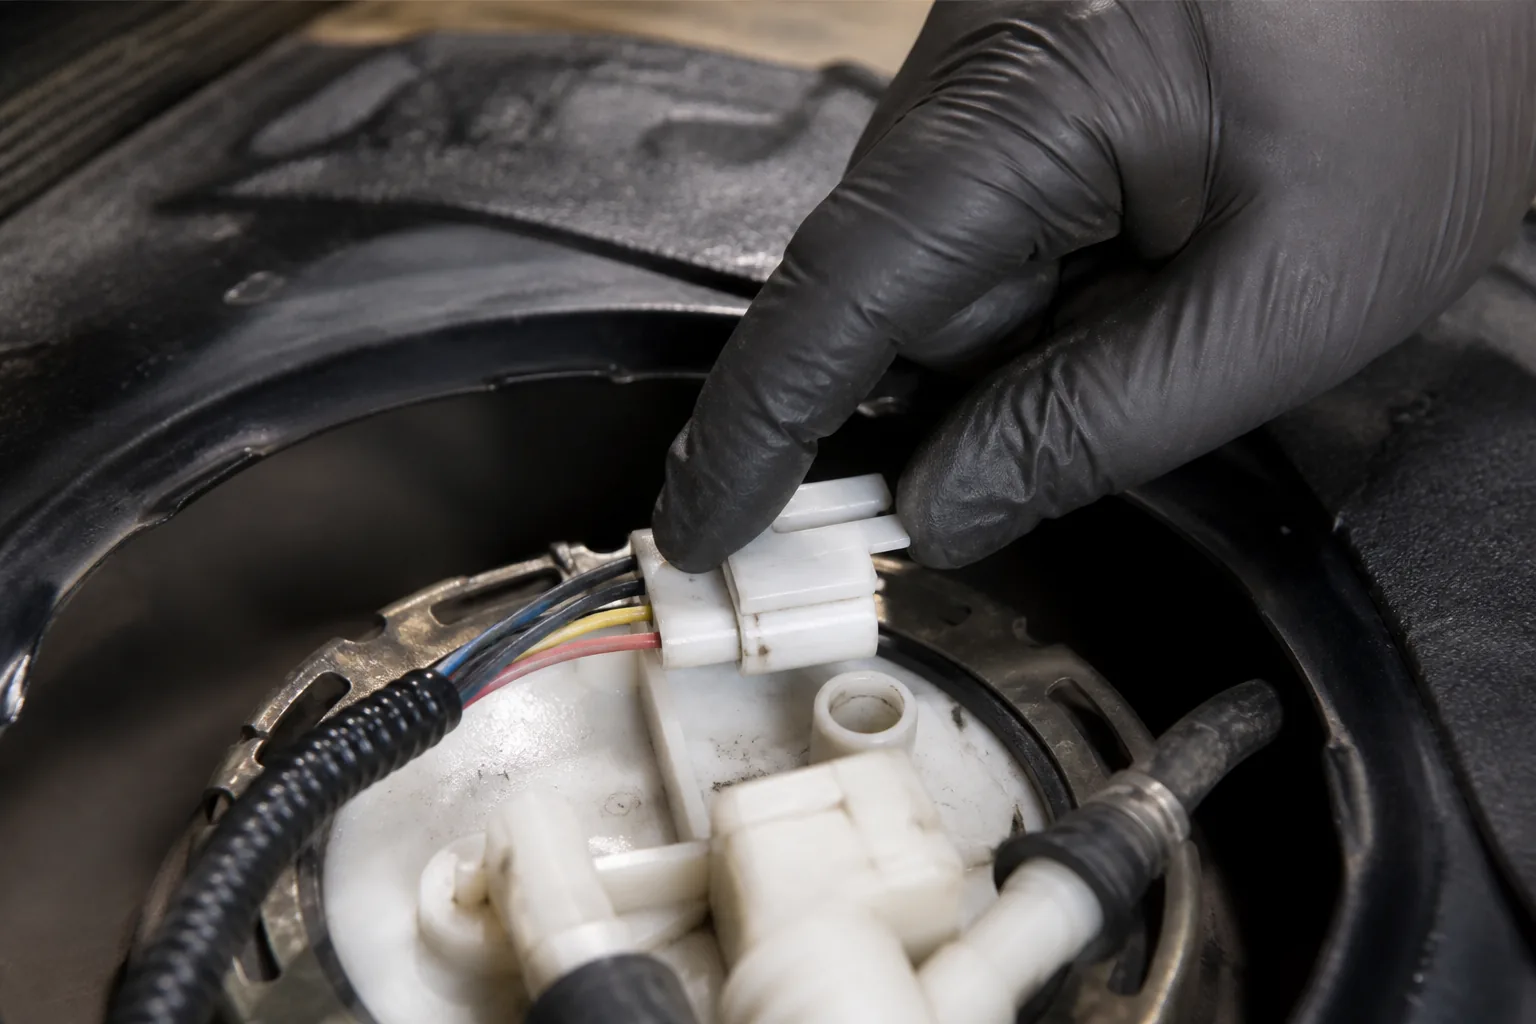
Release any secondary lock, press the primary tab, and pull the plastic housing—that is how to disconnect fuel pump electrical connector work without yanking wires or mistaking a fuel-line fitting for the pump plug. You get battery and pressure precautions, lock styles (CPA/secondary vs primary), the disconnect sequence, stuck-tab recovery, and a click-and-tug reconnect check before you browse a scoped pump kit.
Safety Order Before You Touch the Connector
De-energize the circuit and control vapor risk before you fight a brittle plastic latch. Park on a level surface, set the parking brake, and disconnect the negative battery cable so a shorted probe tip or slipped tool cannot spark near fuel vapor.
Gasoline vapor and residual rail pressure still matter when the job continues into fuel lines. Fuel pressure relief is often built into OEM service steps: some procedures deliberately disconnect the fuel pump module connector, then crank briefly (for example two seconds or more on one documented Mitsubishi method) so the pump cannot re-pressurize the line before pipes are opened. Follow the vehicle’s service information for wait times after battery disconnect on modules that need it.
| Order | Action | Why it matters |
|---|---|---|
| 1 | Ventilate; no smoking/open flame | Fuel vapor ignition risk |
| 2 | Disconnect negative battery cable | Cuts pump circuit power and accidental spark |
| 3 | Decide if fuel lines will open next | If yes, use OEM pressure-relief sequence |
| 4 | Clear dirt around the connector | Grit can trap secondary locks |
| 5 | Identify electrical plug (not fuel fitting) | Wrong tool breaks the wrong part |
Keep shop towels ready if you later crack a fuel fitting—residual pressure can spit fuel even after a relief crank. Eye protection helps when plastic tabs snap under pick pressure.
Important: Pull on the connector housing only. Never use the wires as a handle—OEM campaign language explicitly warns that wire pull damages terminals inside the lock.
If you still need a power-path check after reconnect, use the lateral how to test a fuel pump fuse procedure rather than skipping straight to a pump quote.
Electrical Plug vs Fuel-Line Fitting
The wiring plug and the fuel hose quick-connect are different parts with different locks. Search results for this keyword often surface fuel-line fitting videos; using a fuel-line tool on an electrical housing is how tabs crack. A fuel-line quick connector is a hose end with retainer ears or a collar—not a multi-pin wiring shell.
The electrical connector is usually a multi-pin plastic shell on the fuel pump module or sender lid. It carries pump power (and often sender circuits). The fuel-line fitting is a hose end with its own retainer ears or collar—no copper terminals inside.
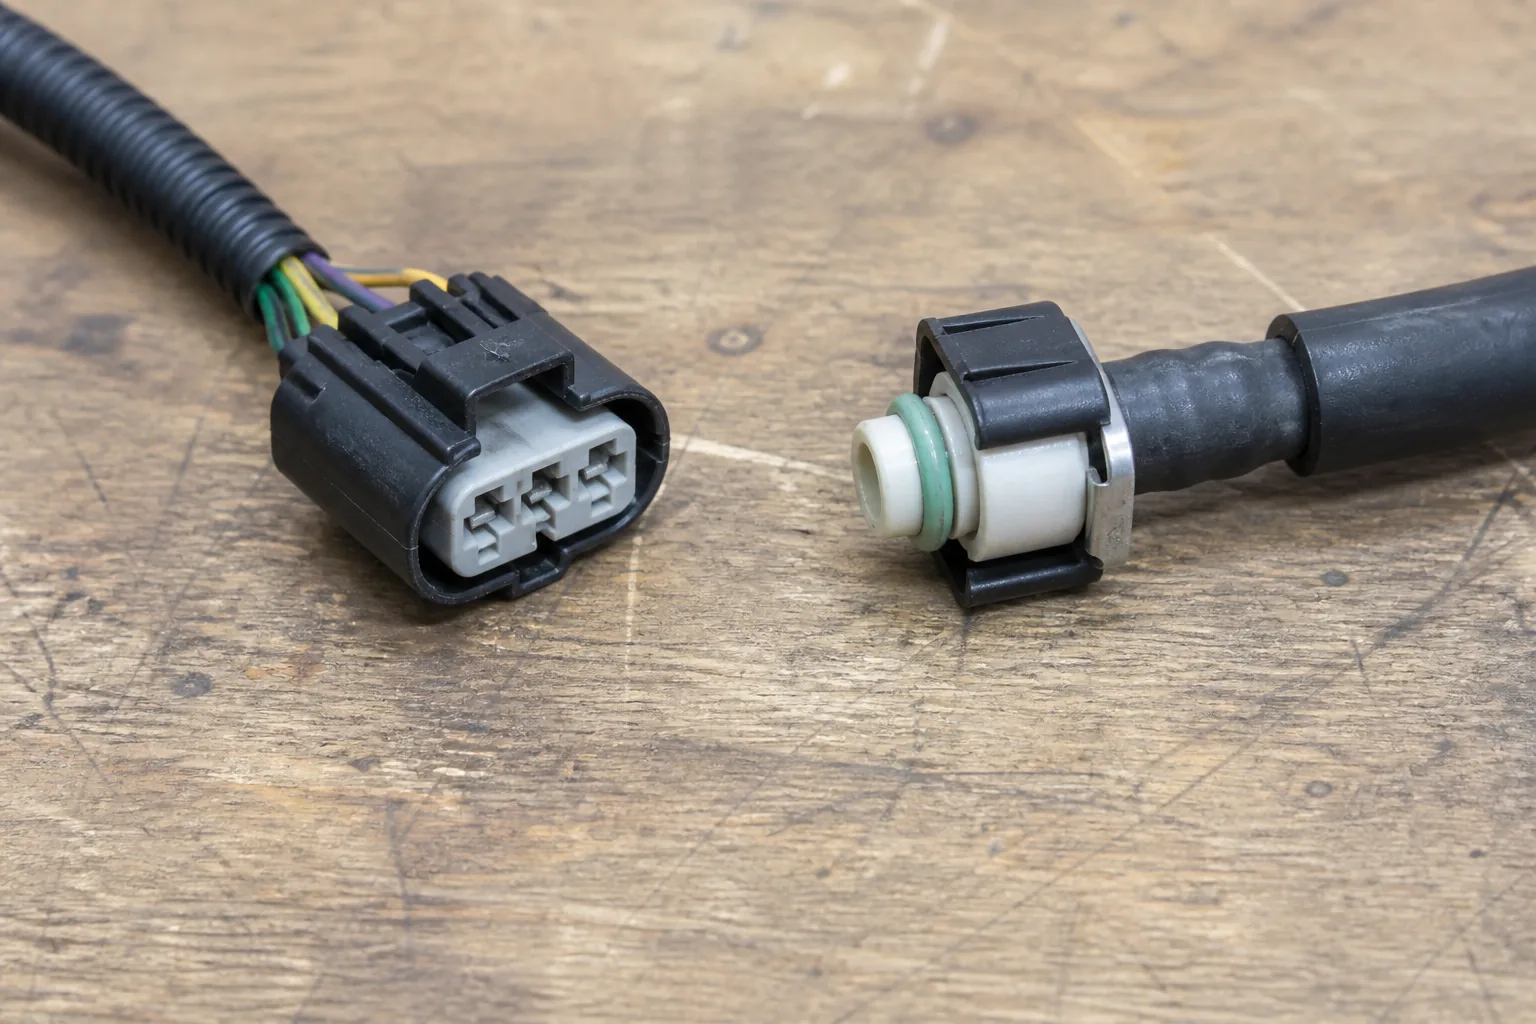
Confirm which object you are releasing before you insert a pick. If the part has metal pins and a wiring loom, treat it as the electrical job in this article. If it is a fuel hose with a plastic retainer collar, stop and use fuel-line service data instead.
Access varies: rear-seat inspection lids, tank-top after partial drop, or above the tank with the vehicle raised. Tight spaces tempt sideways prying—pull the housing straight along the pin axis once the latch clears.
Secondary Lock, CPA, and Primary Release Tabs
Most stubborn “won’t unplug” jobs are incomplete secondary-lock travel, not a welded connector. When you need to unplug fuel pump connector housings that fight back, check the fuel pump connector secondary lock first—a colored CPA slider, wedge, or catch that must slide, lift, or pull outward before the primary release tab can move.
| Lock style | What you see | Release order |
|---|---|---|
| Colored CPA / secondary slider | Orange, red, or yellow bar on the shell | Move CPA fully, then press primary tab |
| Single primary latch | One center or top button | Depress fully while pulling housing |
| Dual side pinch tabs | Ears on both sides | Squeeze both, then pull straight |
| Hidden slot tab | Narrow slot in a raised rib | Lift/depress with a thin pick, then pull |
Live AI Overview language matches this order: release the secondary lock first, then depress the main tab or squeeze both pinch tabs. Forum technicians on GMT trucks describe an orange side tab that must clear before the white squeeze tab works—forcing the orange piece is how it snaps off in the bay.
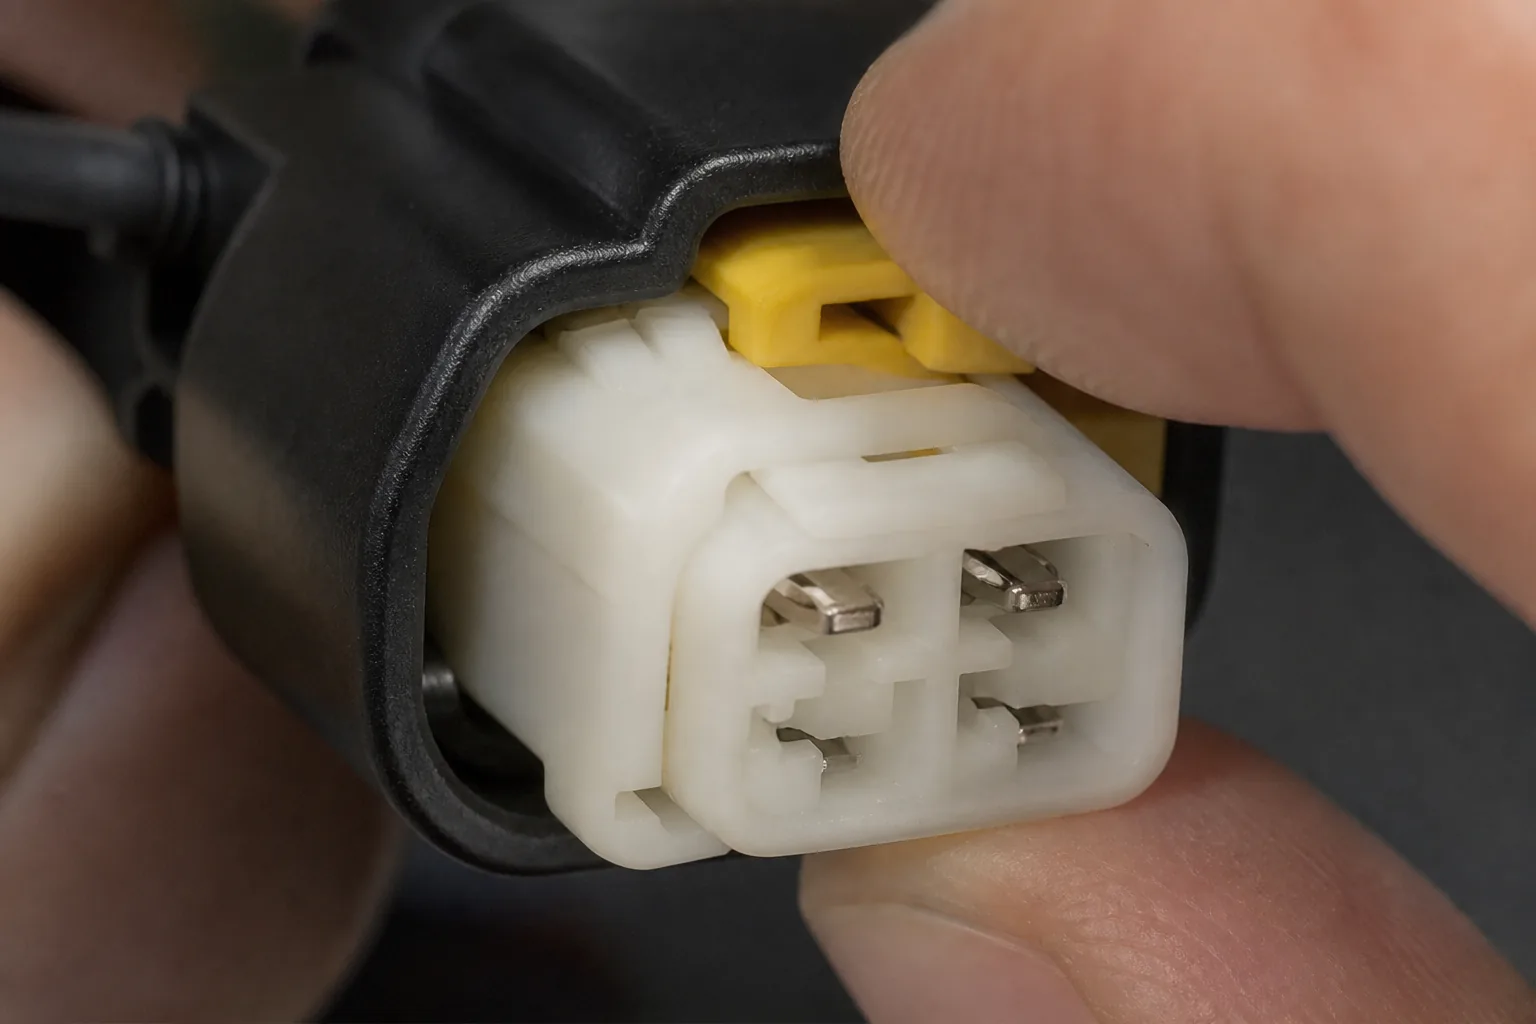
Look for a second color or a sliding wedge before you lean on a pick. If the CPA is already removed and the plug still binds, the latch may still be in the locked geometry—push the connector fully home, then re-stage the CPA motion before pulling.
Step-by-Step: How to Disconnect the Fuel Pump Electrical Connector
Press the release, then pull the plastic housing straight off the module—never yank the wires. With battery negative disconnected and the correct plug identified, work in this order.
- Wipe or blow grit from around the shell so you can see the CPA and primary tab.
- Move any secondary lock / CPA fully to the unlock position.
- Depress the primary release tab (or squeeze both side pinch tabs) and hold it.
- Pull the connector body straight along the pin axis. A light wiggle is fine; sideways prying is not.
- Inspect pins, seals, and broken lock ears before the next step of the job.
OEM campaign wording for harness reconnect later assumes you can press the release tab and lift the connector cleanly—practice that same straight pull now. If you need a thin flat screwdriver or pick, use it only to assist the tab, not to lever the shell against the module.
For upstream circuit sizing after the plug is off, keep relay selection on the sister what size relay for fuel pump page. When the job continues into module removal and reseal, hand off to how to install fuel pump assembly. Stop at the connector here.
Photograph the CPA position before you disturb it on unfamiliar housings. The next tech on the ticket should not reverse-engineer a half-broken orange slider from memory.
Stuck Connector Recovery Without Breaking the Tab
If the plug will not move, push it fully home, clear dirt, and retry the locks—do not escalate force on aged plastic. Off-road and underbody debris pack into the latch channel so the tab never clears the retainer nub even when you think you are pressing hard enough.
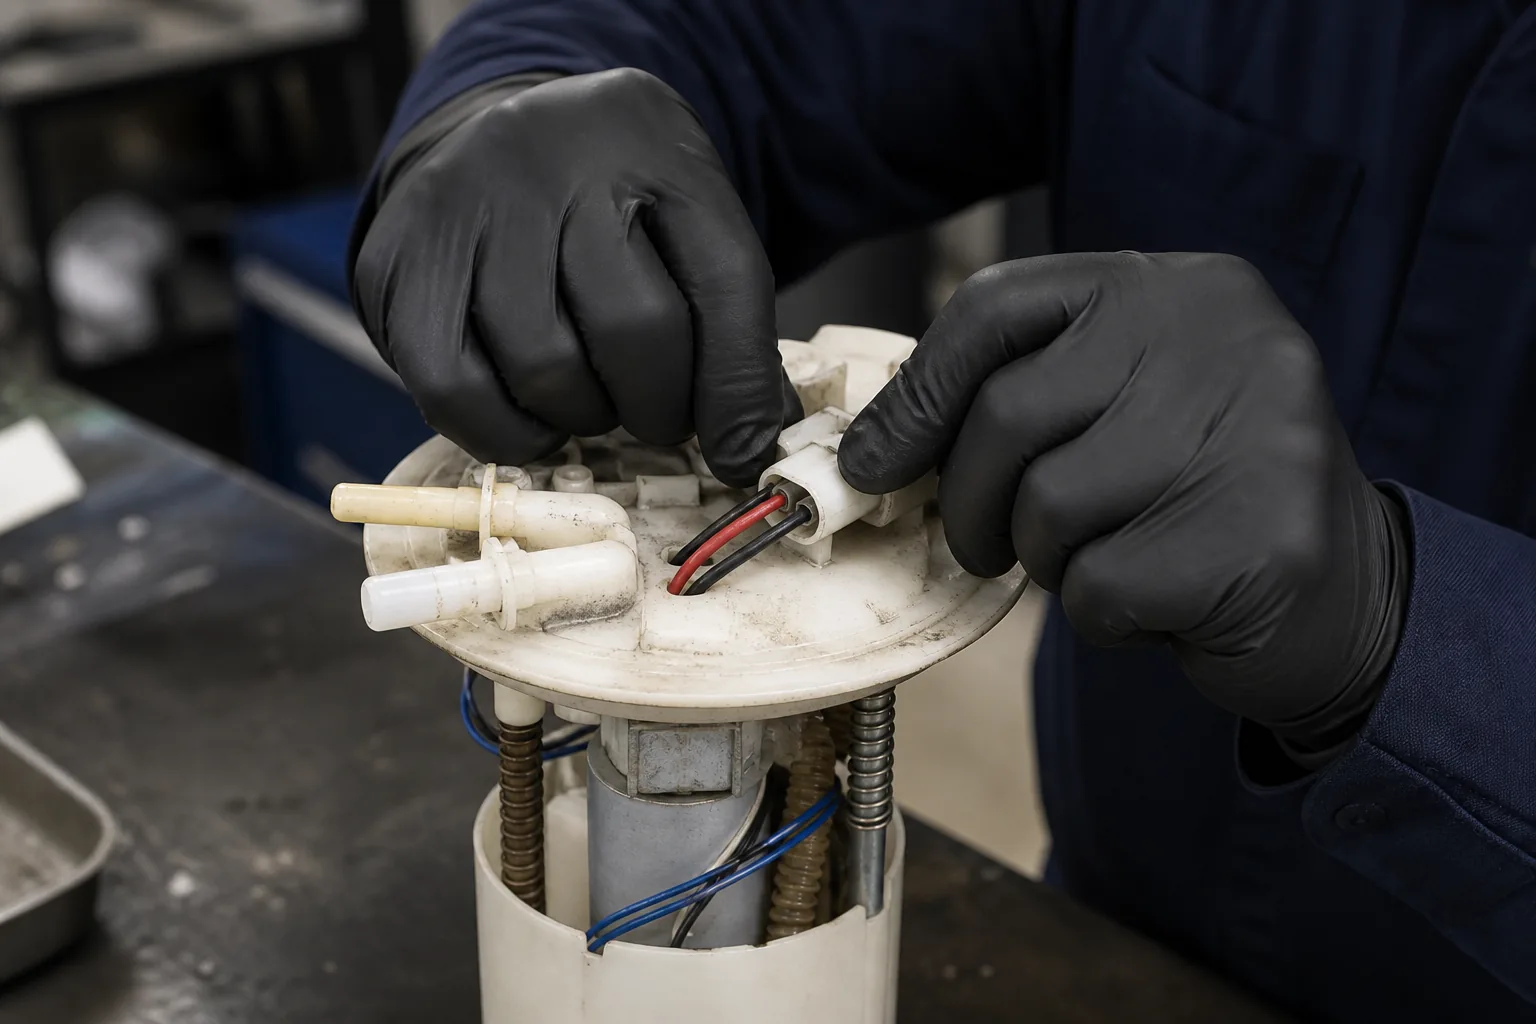
From the field: Wrangler TJ owners describe sand and dirt locking the pump connector for days until someone pushes the housing forward and clears grit so the internal tabs can release—pulling harder alone only rocks one side.
Chevrolet Tahoe threads show the other failure mode: an orange CPA that snaps when lifted the wrong way. Once the secondary lock is cracked, stop. Replace the connector or approved pigtail rather than zip-tying a half-broken shell and hoping the intermittent contact holds through a road test.
Useful stuck sequence:
- Push the connector firmly toward the module to compress the weather seal.
- Blow or brush debris out of the latch channel.
- Re-seat and fully travel the CPA / secondary lock.
- Hold the primary tab depressed and pull the housing—not the loom.
- If plastic cracks or a piece pops off, bag the broken bits and order the connector repair path.
Contact cleaner meant for electrical connectors can help free grit; avoid soaking the module with solvents that attack housing plastics. Heat guns are a last resort and easy to overcook brittle nylon.
Reconnect, Click, Tug-Test, and Seal Checks
Seat the connector until you hear or feel a click, then tug the housing to prove the latch caught. OEM recall language for fuel-pump harness reconnect calls for pushing down until an audible click and a gentle tug on the harness—copy that shop habit even when you are not on a campaign.
Align keyways so pins are not bent on the fuel pump module harness. Re-engage any CPA / secondary lock to the locked position after the primary latch seats. Look at the weather seal: pinched or missing seals invite corrosion that recreates the stuck-tab job next season.
After battery reconnect, use the vehicle’s prime cycle (key ON without cranking as specified) and check for fuel smell or wet fittings if lines were opened. A silent prime with a known-good connector points back to fuse, relay, or the pump itself—not another yank on the plug.
Keep dielectric grease as an optional corrosion barrier on terminals when service information allows it—do not pack grease so deep that it hydraulics the housing off the latch.
When to Replace the Connector vs Browse a Pump Kit
Broken locks and melted terminals are connector problems; a dead pump with a healthy plug is a different quote. If the CPA is snapped, pins are burned, or the shell no longer latches, repair or replace the connector/pigtail before condemning a new module for an intermittent feed.
If the connector clicks, tug-tests, and still shows no pump current with fuse and relay verified, move into pump diagnostics and mounting architecture. For mount style decisions, see external fuel pump vs internal rather than stretching this connector page into a full assembly R&R.
Document broken CPA color and pin count on the ticket. That note saves a second parts run when the counter looks up the repair connector versus a complete install kit.
Browse Kangsong Electric Fuel Pump Kits with Installation Provisions
When the connector and power path are sound and the pump itself is the failure, browse a vehicle-scoped installation kit with main connector documentation—not a random assembly photo. One published Kangsong example is the Electric gasoline fuel pump with installation kit (C/K example) for 1987–1995 C/K 1500/2500/3500 pickups: the live product page lists accessories included, an OE-comparable harness, and a 2-pin main connector count under that SKU’s scope.
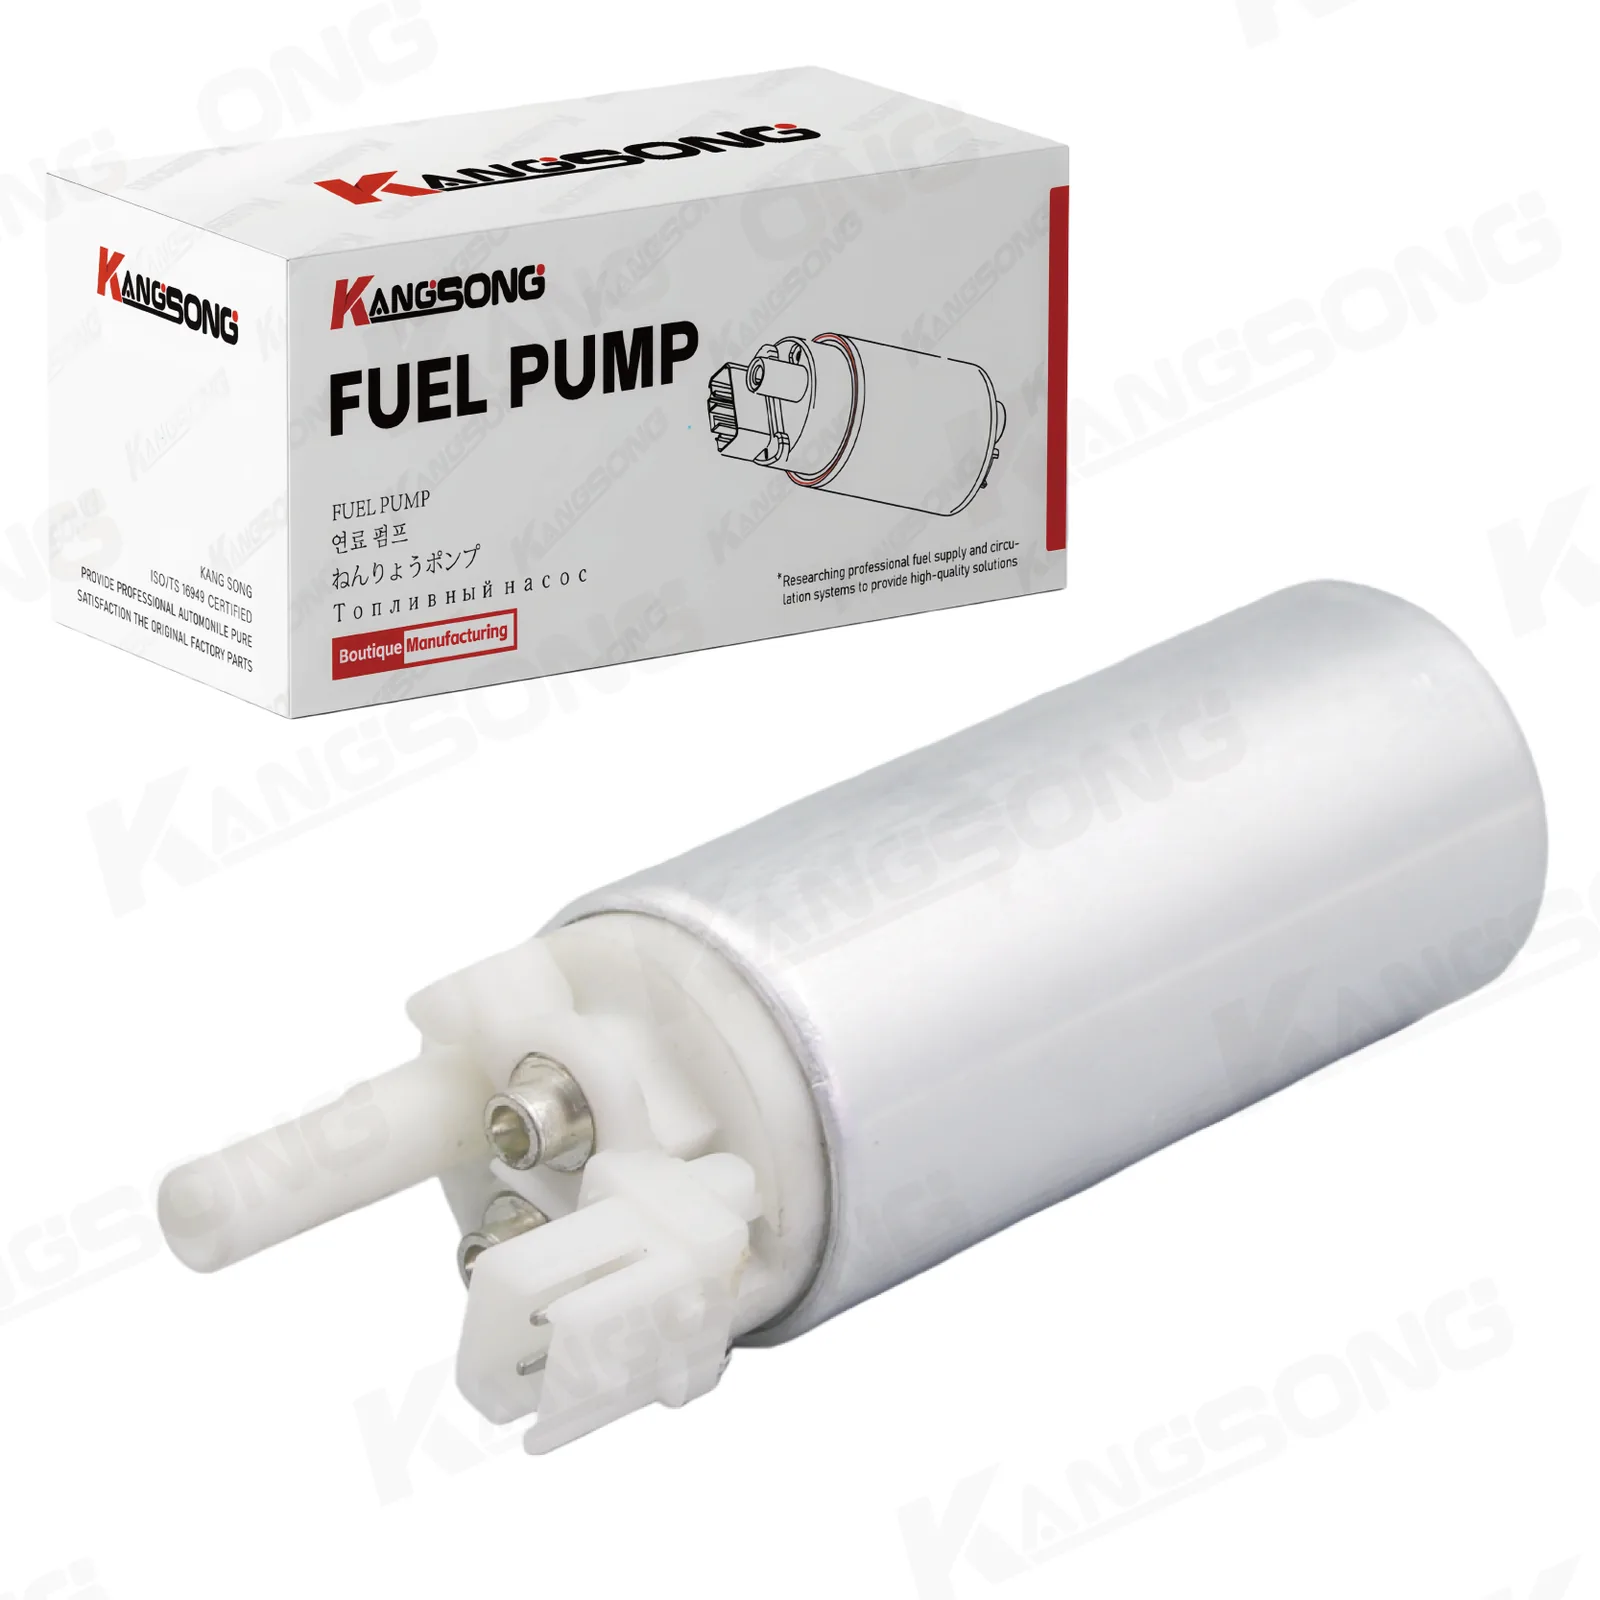
Confirm OE numbers and vehicle application before ordering. That C/K kit is not a universal fitment claim, and it is not a substitute statement for any third-party brand. For broader catalog navigation use the products root category.
A clean click-and-tug plug belongs in a clean install package, but the steps above do not replace a full assembly installation guide.
FAQ
How do I disconnect a fuel pump electrical connector safely?
Disconnect the negative battery cable, release any secondary lock/CPA, press the primary tab (or squeeze both pinch tabs), and pull the plastic housing straight off—never the wires.
What is the secondary lock or CPA on a fuel pump plug?
It is a colored slider, wedge, or catch that blocks the primary latch until you move it. Many trucks use an orange or red piece that must clear before the main release works.
Why won’t my fuel pump connector come off?
Common causes are incomplete CPA travel, dirt packed in the latch, corrosion, or pulling at an angle. Push the plug fully home, clear grit, then retry the locks before adding force.
Can I pull on the wires to unplug it?
No. Pull the connector body only. Wire pull can extract terminals from the housing and create intermittent faults that look like a bad pump.
Is disconnecting the electrical connector the same as releasing fuel lines?
No. The electrical plug uses a wiring latch; fuel-line quick-connects use hose retainers. Using the wrong method breaks the wrong part.
Do I need to relieve fuel pressure just to unplug the connector?
For a battery-off electrical unplug, the main hazards are shorts and broken plastic. When the job continues into fuel pipes, follow the OEM pressure-relief method—some procedures use pump-connector disconnect plus a brief crank to keep the pump from rebuilding pressure.
How do I know it is fully reconnected?
Push until you hear or feel a click, re-lock any CPA, then gently tug the housing. Inspect seals and run the specified prime/leak check if lines were opened.
What if I broke the orange/red lock tab?
Stop forcing it. Replace the connector or approved pigtail. A cracked CPA is a known shop failure mode and will not reliably hold after a zip-tie workaround.
References
- NHTSA recall service bulletin RCRIT-19V316-4003 (Nissan fuel pump lock ring / harness connector click and tug)
- NHTSA recall service bulletin RCRIT-08V429-3447 (Hyundai fuel pump wiring — do not pull on the wire; click lock)
- Mitsubishi techinfo — Fuel pump connector disconnection (how to reduce pressurized fuel pressure)
- Chevrolet Forum — Unplug fuel pump electrical connector? (orange CPA / stuck tab discussion)
- Jeep Wrangler TJ Forum — Fuel pump connector stuck (dirt bind / push-forward recovery)